

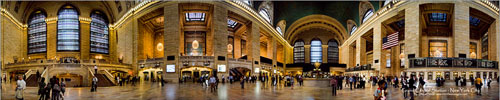
Panorama Photography
|
| I
use auto focus but check that the spot focus points light up on the
object of interest then I recompose to line up the images as I capture
each image. This may not be necessary for far away shots but I do
it as a matter of habit. When shooting closer shots I set a higher f stop for wider DOF and am careful with spot focusing and recomposing, often to take several sequences of the same scene to get it right. As I never use a tripod, recomposing is easy. In low light scenes I crank up the ISO for at least a 1/30 sec shutter speed and lean against something. |
2. If you have a polarizing filter on your lens consider removing it, since the angle of the camera to the sun changes as you move the camera across the scene thereby varying the degree of polarization in each shot. Some software products with a photo merge feature sometimes reveal significant banding in the final panorama images due to the tonal changes from the different levels of polarization in each shot. However Photoshop Element Version 6 and up and Photoshop CS3 and up use photo merge solutions that solve this banding issue quite well so removing the polarizing filter may not be required.
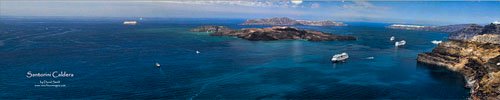
Santorini Caldera
3. Shoot the first shot of a panorama photography sequence with your arm in the shot (then shoot the same shot without the arm) so when I look at tons of thumbnail images in my editing browser I can quickly spot the first of a panorama sequence by looking for my arm in a shot. Shoot slowly holding the camera steady, feet apart and elbow to your chest and be sure to overlap each image by at least 30% when shooting. Use a horizon line, road edge or building feature to ensure you panning shots are lined up. Ideally a tripod should be used but I never carry one anymore while travelling.
4. Use good composition and avoid centering the horizon line. For example if the foreground is exciting (a blue lagoon) and the sky is boring, place the horizon in the upper 2/3 of the shot. If it is a dynamic sunset scene place the horizon in the bottom 1/3 of the scene. Sunset shots are dramatically improved by underexposing by at least -1 or -2 EV.
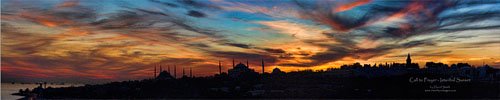
Istanbul Sunset
5. If your scene is close to you (eg. in a small room, objects within about 50 feet) you will get panorama photography distortion effects arising from the fact that the optical center of your camera (the nodal point) is never the same as the tripod screw position or hand held pivot point of the camera. This is called parallax error but is not an issue for most travel panoramas since most of your panorama features will be far away.
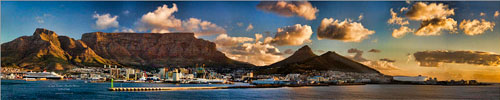
Cape Town
After capturing the multiple set of images with your camera, stitching of your panorama photography images is easy with today’s stitching software. Note that some cameras stitch the images in camera or use a video capture technique without requiring a computer and software.
Image Sizing.
Before merging the images into a panorama you need to decide on the final size of the panorama photograph and to match that size with your own printer or photo finishers capability. A common panorama aspect ratio (i.e width:height) is 4:1,5:1 or 6:1.
A typical image resolution for printing is 300 pixels per inch so a 100 in wide x 20 in. tall panorama print (a 5:1 aspect ratio) requires a crop width of 100 in x 300 pixels/inch = 30,000 pixels and a height crop of 20 in. x 300 pixels/inch = 6,000 pixels.
| In short, 30,000 x 6,000 pixels. Simply select your crop dimensions for 30,000 x 6,000 pixels and set the resolution in the crop tool to 300 pixels/inch and voila you have a crop! Decide on image size before select the crop and watch edges and key components before final crop is done. | 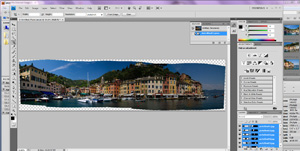 |
Some online printing services may restrict image file size so your huge panorama file may not be accepted. Check the uploading specifications for your printer service as some may accept lower resolution (as low as 100 pixels per inch), compressed files or smaller dimensions for upsizing. Alternately deliver the image file directly. Expect file sizes in the range of 10 Megabytes to 50 Megabytes and more depending on the camera megapixels, number of images used in creating the panorama, cropping, image resolution and jpg compression or quality settings used.
The screen snapshots in this masterclass are taken from Adobe Photoshop CS4's “Photomerge” tool which is identical to Photoshop Elements (9 and up) File/New/Photomerge tool. Most scenic and travel panoramas involve subjects which are a long distance from the camera so shooting handheld and leaving the software default settings and options on the wizards works well.In some cases, particularly for closer architectural images, you may need to experiment with image layout and image distortion correction option settings to get a good merge. Sometimes just repeating the software process creates a better merge.
Typical Photo Stitching Steps
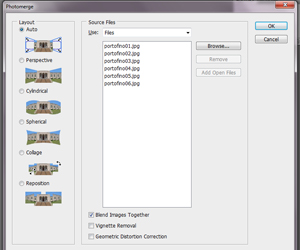
| Select your panorama series images using the “photomerge” tool. | 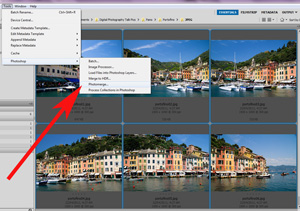 |
| The default
settings work well
with scenic panoramas. Experiment with various options as necessary. |
 |
When your subject is closer to the camera, within 50 feet or so, you can get parallax errors associated with the fact that the optical center of the camera is not the same as the tripod screw pivot point or center point of a handheld sequence. In such cases the camera position needs to move forward or backward to minimize this type of distortion using somewhat expensive ($200 plus) adjustment mounts or like I do jury rigging off tripod center camera mounts with screws and metal pieces for a few dollars.
To correct perspective distortion and correct buildings falling in (i.e. vertical lines are not vertical) in Photoshop CS or Elements use Select/All and the Edit/Transform/Perspective options then select and drag the tiny corner boxes for vertical true lines. Watch for an upcoming Blog post this month entitled “Easy Correction of Perspective Distorted Travel Images”
Panorama Stitching Software
In addition to the easy to use panorama tool wizards in Adobe (www.adobe.com) Photoshop CS (CS2 and up) and Photoshop Elements (9.0 and up), software supplied with some cameras and other software solutions are available.
Other panorama photography stiching software includes the free Hugin Panorma Photosticher (www.hugin.sourceforge.net), PTgui (€ 79 and up) from www.ptgui.com and panatour (€99.00) from www.kolor.com.
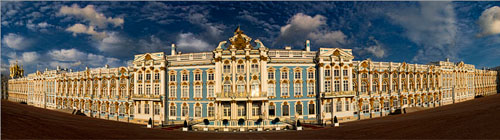
Catherine Palace, Russia
Share Your Panorama Photography Images
You are welcome to post links to your online panorama
images in the
comments below or join and upload your travel images to David's
Facebook
Group: Travel Photography Tips and Photo Adventures.
|
David Smith
is a world travel and event photographer, travel writer, Blogger,
keynote public speaker and cruise ship guest lecturer.
More of his superb Panorama Photography Images can be seen at 5-david-smith.artistwebsites.com and in his gallery at archive.interfaceimages.com. He also writes a Blog featuring Photo Tips & Travel Adventures at www.interfaceimages.com/blog and has a Facebook Page at www.facebook.com/interfaceimages. |
Recommended Reading for Light Panorama Photography
- Mastering Digital
Panoramic Photography -
Harald Woeste

 |
![]()
| Image of the Month |
 |
| Click here to download it. |
| Find It |

Custom Search
|
| All of the advice, tutorials, masterclasses and ideas on this website are available to you at no charge. Even so, its upkeep does incur costs. |
|
| If you feel that
the site has helped you then any contribution you make, however small,
would go towards its ongoing maintenance and development. Thanks for your help. |
| Book of the Month |
 |
| Click here to read the review. |
|
|
New! Comments
Have your say about what you just read! Leave me a comment in the box below.