 |
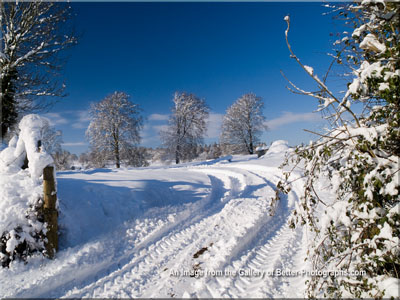
Snow Photography
"Tips to
help make sure snow stays white and bright."
Although tempted to do
some snow photography, I have just come indoors for some warmth
having cleared snow from my house to the road. Sometimes the need to
get to the village shops has to take priority.
According to the weather forecast, the weather is unlikely to change by
tomorrow so I shall be out with my camera at first light. Meanwhile, I
shall brush up on the notes I took when the opportunity for snow
photography occurred last January and I was able to put together a
slideshow for my neighbours in our village -
Top Snow
Photography Tips
1
|
When viewing a
bright scene like snow, a camera tends to underexpose
the image. Snow turns out looking dull or grey in the photograph.
Use your exposure compensation to increase exposure. Start by
increasing it by +1 stop and assess the result. This is best done with
your Highlight Warning set to warn you of blown out highlights, which
are shown as a flashing light (colour on some cameras) on your camera's
LCD when you review
your photos.
Fine tune this adjustment by increments of 0.3 -
- reduce it
if more than a few spots of flashing colour appear
- increase it if the
snow looks too dull.
|
2
|
All subjects,
especially light ones like snow, pick up a colour cast from
the surrounding light. Photos of snow taken in daylight under a blue
sky often have a
blue tinge which an auto white balance setting is unlikely to correct.
You can use your White Balance setting to remove this colour cast - a
quick way is to increase the Custom White Balance setting to about
8,000
degrees Kelvin, take a shot then review the photo on the LCD screen.
Still too blue - INCREASE the setting; too red - DECREASE the setting.
A more accurate method, although a bit of a fiddle first time
around, is to use the One Touch White Balance function. The way to do
this
differs from camera to camera and is explained in the manual.
On my
Olympus Cameras, I set the Function Button for One Touch White Balance,
point the
camera to fill the frame with a patch of snow I want to photograph,
hold down the function button and press the shutter release and then
use this as the basis for my
white balance.
|
3
|
Snow
photographs
tend to look more stunning with blue sky as a
background. Try using a polarizing filter to emphasise the colour.
|
4
|
When
photographing
wildlife, especially birds, a higher shutter speed
will be needed. Do not be afraid to increase the ISO setting to 800 and
beyond. There are rarely many dark areas in snow photography so
digital noise is not likely to be a problem.
|
5
|
Remove the
camera
from its case and take off the lens cap as soon as
possible and well before taking the first shot. If the camera has been
kept indoors in the warm, it will take a while for the condensation to
evaporate from the lens.
|
6
|
Take spare
batteries
in a warm pocket - cold batteries drain surprisingly quickly.
|
|
Of course your digital camera might have a "Snow" setting to start you
off but, as with all such settings, it will not allow you to make any
fine adjustments. The only way to make full use of the capabilities of
your camera is to set it to manual, aperture or shutter priority and
make adjustments as you progress.
|
|

All of the advice, tutorials, masterclasses and ideas on this website are available to you at no charge. Even so, its upkeep does incur costs.
|
|
|
If you feel that
the site has helped you then any contribution you make, however small,
would go towards its ongoing maintenance and development.
Thanks for your help. |
|


New! Comments
Have your say about what you just read! Leave me a comment in the box below.