|
Great Wildlife Pictures“How to take that Special Photo”Article and Images by Michael Huggan ARPS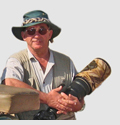
How many times have you looked at wildlife pictures and seen a shot of a lion, cheetah, rhinoceros, or elephant and thought ‘I wish I had taken that’?
Most people’s first experience of Africa is a couple of nights in a safari camp. This is often part of a package combined with a beach holiday or similar. Normally you are in a vehicle with a number of other people, not all of them budding photographers seeking great wildlife pictures. The driver of the vehicle would see a group of animals and move in as close as possible to give you a good view. This usually suits most of the occupants who use compact cameras to take snapshots for the album and it also gives the feeling of ‘getting in close’ to the subject. Unfortunately, if you want great wildlife pictures, moving in as close as possible is the worst thing that can happen for two reasons -
For landscape shots and general photography the compact camera is fine, but for that special shot you have in mind, a different approach is required.wildlife pictures
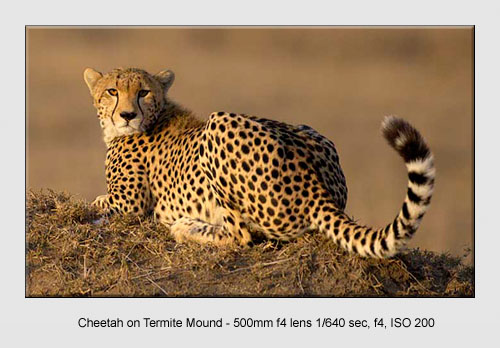
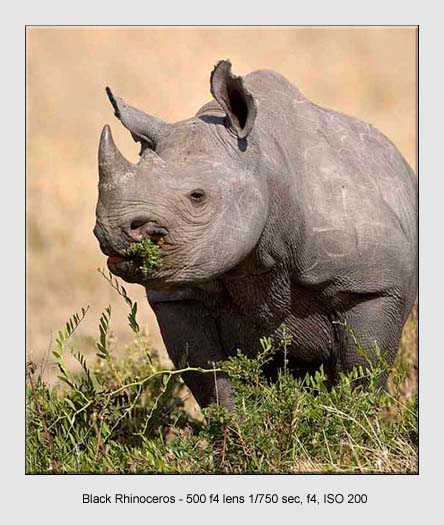
The pictures of a cheetah and a black rhinoceros were both taken from a vehicle at least twenty metres away. What do these pictures have … ?Wildlife Pictures ... Impact ...
... and that’s what we want.
Early one morning we spotted a cheetah out hunting and followed it from a distance ensuring the sun was rising behind us. The cheetah climbed up on top of a termite mound, settled, but looked away from us. I tried to attract its attention by taking a couple of shots hoping the cheetah would hear camera shutter. Fortunately, the cheetah looked round with its tail twitching and - click – that was the shot. Seconds later the cheetah moved off the termite mound continuing on its journey. This was one of those occasions where I had a few seconds to get the shot. If I had not been looking through the lens when it turned its head round, I would have missed the shot. On another occasion I was observing a family of three black rhinoceros and after about fifteen minutes one moved into the position as shown in the photograph. The rhinoceros is a powerful looking animal and with the low camera angle and good composition resulted in a strong picture.
Listen to your guide. They generally know what the animal is going to do next. That will help you to be ready to take the next picture. 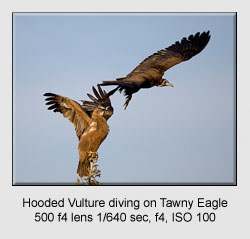
I remember on one occasion sitting in the vehicle watching two lions devouring the remains of a kill. Two silver-backed jackals were harassing the lions trying to snatch a free meal. To our left a group of vultures were waiting their turn to scavenge the carcass, to the right of us a tawny eagle landed and chased a small rodent for a couple of minutes. Behind us, a vulture dived on another tawny eagle perched on top of a tree.
The occupants of the vehicle did not see any of the other activities which turned out to be the best photographs I took on that occasion. 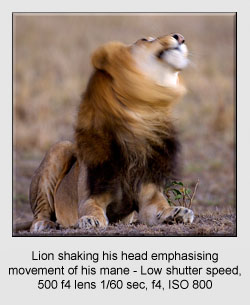 You should always be looking for that special picture as you look out from your vehicle, or sitting by a river bank. Scan everything and constantly assess what would make a good picture. Watch your subject and envisage what it would look like against a certain background, frame the image in your mind. Do you need a long telephoto lens, or shorter focal length lens?
 Landscape photographers often frame the picture with their hands, or use a card with a hole in to look through. By moving the card nearer, or further away from your face, you get an idea of the picture you want.
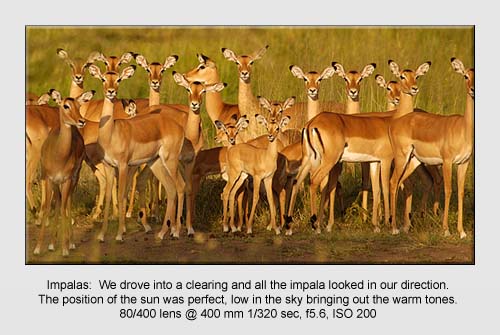
The requirements for shooting from a vehicle are an open top roof with a 360 degree view, including the sky. Freedom to move from side to side and a place to put your a bean bag to support your camera and lens. Make sure the vehicle’s engine is switched off. There may be situations where your driver will not want to switch off the engine, particularly if there is an elephant, or other potential threat nearby. On occasions you may find reversing quickly is the best move! Use the side windows of the vehicle to shoot through. Remember to clean the dust out of the side runners otherwise the windows will not open. Positioning yourself in relationship to the sun and the subject is critical. If the subject is stationary you should have time to manoeuvre the vehicle so the sun is shining over your shoulder from behind evenly lighting the subject.wildlife pictures Another type of picture shows the subject backlit by the sun creating a ‘halo’ effect. This type of picture is called a ‘rim lit’ shot. The sun is behind your subject and you are looking through your lens in the general direction of the sun. This type of shot is best taken with a telephoto lens with a long lens hood that minimises flare from the sun’s rays. A lens hood is essential and should be mounted on all your lenses. Two hours after sunrise and two hours before sunset are those magical times where warm tones light the landscape and your subject.
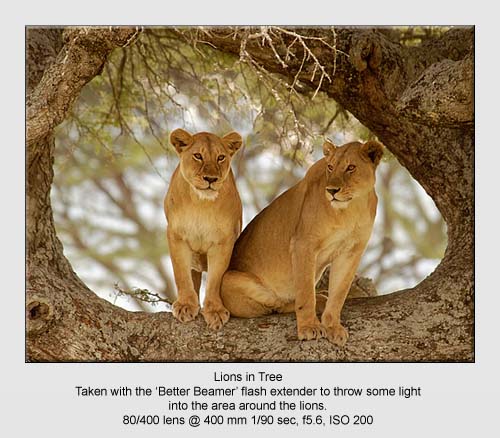
On those cloudy rainy days, your approach will be different. A bright overcast sky will ensure the colours of the subject are not burnt out from harsh sunlight, particularly around mid-day.wildlife pictures However, if you are photographing big cats during the middle of the day watch out for their eyes as they usually look black giving that ‘dead’ feel about the subject. Should this scenario arise you can use flash to try and place a ‘catch light’ in the eyes bringing the picture alive. There is an accessory available (Better Beamer) that clips to the head of the flash gun and looks like a set of blinkers. The light from the flash gun is channelled between the blinkers, through a Fresnel screen concentrating the flash and extending the range. Practice is required to get the right flash/daylight setting.
EquipmentWildlife Pictures What equipment do I need? As a minimum, a single lens reflex (SLR) camera body, preferably two identical bodies, a wide to medium telephoto lens and a long telephoto lens.wildlife pictures There are a number of combinations you can put together, but a range from 18-400 mm will suit most of your requirements. There are a number of zoom lenses that extend from 80/100 to 400 mm. I use Nikon digital equipment with lenses that have a 35mm format equivalent of 1.5x their focal length - i.e. the 35mm equivalent to my 500mm lens is 750mm. Other manufacturers have lenses with different conversion factors - e.g. for Canon digital cameras with their lenses this factor varies between 1.0x to 1.6x and for the Olympus 4/3 system the factor is 2x. I often read about the importance of having a back up camera body just in case there is a failure of one body. Whilst this is good advice, it is essential when photographing from a vehicle the second body is fitted with a shorter focal length lens. When travelling in a vehicle the wildlife can and does come from all directions often without notice! Having two cameras with different focal length lenses will ensure you will capture that far away picture and the close up. Having to change a lens at that crucial moment usually means you have missed the shot. Furthermore, if both bodies are identical the change from one camera to the other is seamless.wildlife pictures
If the camera bodies are different models, the controls will not be the same. You will certainly pause to check the settings, if only for a moment, so it may well be too late to grab the shot.wildlife pictures Changing lenses in a dusty environment will certainly increase the risk of getting dust inside the camera body and on the sensor. Do it if you have no alternative. Change the lens inside the vehicle with the lens mount facing downwards. Make sure you have a neutral colour filter on all of your lenses. This will protect the front element of the lens from dust and scratches. It is better to replace the filter than the front element of the lens. The filter should be of the same high quality glass as the lens, either made by the lens manufacturer, or equivalent. I assemble my camera and lens units before I get into the vehicle. The lenses are not removed until I return to the camp, or lodge for cleaning. You must have your cameras to hand with the lenses attached, switched on and bean bag at the ready. When you suddenly come across a subject you can pick the right camera look through the viewfinder and press the shutter without thinking about “is it switched on?”, “is the shutter speed right?”.wildlife pictures By pre-focusing the lens to infinity or just under, will minimise the time the auto focus takes to lock as you depress the shutter. You can now ‘Point and shoot’, concentrate on the image in the viewfinder and not the camera settings.
Ensure all your straps are removed from the camera. Rest assured when you pick your camera up the strap will snag around the seat losing you valuable seconds. When you are focussing on the subject make sure all other members in the vehicle are still and not moving about or changing their lenses. No amount of lens image stabilisation (VR or IS) will help you get a better shot if the vehicle is rocking about. In the VehicleWildlife Pictures Most vehicles have seat covers with a pocket at the rear of the seat. The driver often puts water bottles in the pockets for the occupants. Take the water bottles out and put your cameras in the pockets. With the vehicle travelling over rough terrain it is a challenge to hang onto two or three cameras at once. With the cameras in the pockets you are ready to pick any one at a moments notice. An alternative is to have an open top camera bag on the floor of the vehicle to keep your cameras ready. However, the inside of the bag will attract a lot of dust, so I prefer not to keep an open bag in the vehicle. 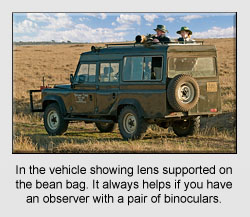
When I am in a vehicle I sit on the back seat with my 500 mm lens unit on my lap, in the right hand seat pocket my 70-200 mm lens unit and 17-55 mm lens unit in the left hand seat pocket, plus my compact in my vest pocket! I always travel with a small sheet so I can throw it over a camera when in the vehicle. With the long telephoto lens on my lap, or by my side I use the sheet to cover this lens and may also tuck a smaller cloth over the cameras in the seat pockets.
I set my cameras to ‘aperture priority’ mode (AV) at the largest aperture size for that lens. If you set the camera to ‘programme mode’ you do not have control as the camera is now making the decision on speed and aperture. I sometimes use ‘shutter priority’ mode to ensure I freeze the motion, but this is not my first choice. Large aperture settings, f2.8 or f4 will give a shallow depth of field and throw the background out of focus. Apertures of f5.6 and above will produce a greater depth of field. There is a relationship between depth of field, focal length of the lens and distance form the lens to the subject. Understand this relationship. ( Click here for more information on Depth of Field. ) If you have a 75-300mm or 80/100-400 mm the largest aperture size at full zoom will probably be f5.6. The shutter speed will default to the fastest within the ASA setting on the camera. Set the ASA speed to 100-400 depending upon the available light. Lower ASA settings produce better quality images (less noise/grain). However, this is always a trade off between depth of field and shutter speed. If the subject is static and you have time to compose the image take extra time and adjust the camera settings accordingly. Landscape pictures require all the elements of the image in focus, so you will have a small aperture f11/f16 low shutter speed and good camera support.
The use of tripods in a vehicle is limited, particularly if you are sharing with other photographers. However, put one in your checked luggage as there are times you will need one. If you are sitting by a river bank with a long lens, a bean bag is no use at all. Tripods should be as sturdy as possible with a good fluid or gimbal head. Spend as much money as you can afford on a good strong tripod. Small flimsy compact tripods are no use at all and are not stable when used with a long telephoto lens. If you are photographing birds in flight, or rapid movement of an animal, a cheetah running, you will need freedom of movement. 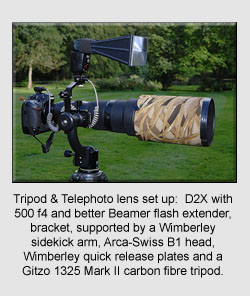 There are a number of good fluid head combinations available on the market. The set up I use is a Gitzo 1325 Mk II carbon fibre tripod, Arca-Swiss B1 ball head with a Wimberley side kick arm and quick release plates on my lenses.
For shorter focal length lenses I use a ‘Kirk L’ bracket on the camera body that fits into the quick release plate on the ball head. If you do not possess a ball head, Wimberley manufacture a head combining both rotary and elevation in one unit. There are also other manufacturers providing similar equipment to Wimberley.
Using a long lens on a tripod requires a particular technique to dampen the complete assembly preventing movement of the lens. A simple technique is to press your face to the back of the camera body whilst looking through the viewfinder, lay your other arm across the top of the lens over the tripod. This will dampen the whole assembly and ensure virtually no movement occurs when depressing the shutter. 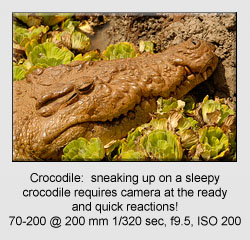
Whilst on the subject of camera supports; the bean bag is the best method of stabilising the camera and lens combination in a vehicle. Make sure you buy a large bean bag sufficient to hold about 4 kgs of beans. Take an empty bean bag with you and when you are at your destination go to the kitchen where you are staying and try and obtain some beans. If beans are not available, buy a couple of bags of rice in one of the local shops. You will find rice is a good substitute for beans and available the world over.
For those shooting digital, some form of storage device is required for your images. I seldom take my laptop with me as it is another item of equipment to lug around. I do not spend my evenings after a game drive editing my pictures. I spend the time cleaning my equipment, downloading the images from the camera’s cards to the hard drives and charging batteries. I prefer to do my editing when I get home. Over the last few years storage devices, camera cards and external drives have fallen in price and increased in capacity, so there is no reason not to have enough storage! I keep my compact flash cards in a metal wallet that holds four cards. I carry two wallets on me at all time and one in the bag. When the card is full, I remove it from the camera, place in the wallet with the back of the card uppermost. So the next time I open the wallet I know which card is full and pick a card with the front label uppermost as a blank formatted card. I usually format all the cards in one of the cameras before the game drive as it saves time formatting in the camera in the vehicle, particularly if you are in the middle of an action scene. As I have two identical bodies the formatting is the same for both bodies. If you have different model cameras you will need to format each card specific to that body.  At present I have about 24 gb of camera flash cards, plus three hard drives ranging from 20-40 gb each. This gives me in excess of 100 gb of portable storage in addition to the flash cards. Each of my cameras has at least one spare battery each that are always with me. Most of the lodges or tented camps have 220-240v electrical supply available to charge your batteries. If you are going to an area where mains electricity is not available invest in a 12/220V inverter to charge your batteries.
What’s in the bag?Wildlife Pictures I am often asked what equipment I use, whilst I am happy to list my equipment I always emphasise it is not the equipment that makes the picture, the picture is first made in your mind. All my bodies and lenses are Nikon. At present my favourite choice is two Nikon D2X bodies, lenses: 500 mm f4, 70-200mm f2.8, 17-55 mm f2.8, 50 mm f1.4, 1.4 and 2.x converters, filters, SB800 flash gun. Tripod and heads as previously described, chargers, batteries, storage devices, cleaning brushes, black tape and cloths etc. Depending where I am going I often supplement the list with another camera body and 105 macro lens, but not much more. Destinations and Tour OperatorsWildlife Pictures There is a tremendous choice of tour operators and destinations all offering that magic trip. Decide what you want to photograph and where you want to go. Talk to others who have been before on photographic trips. The internet is a favourite place for looking at possible sites in other countries. Whilst you may want to sit and watch a pride of lions for several hours, most people just want to tick the box and move on to the next item on the list (the big five).wildlife pictures The bird enthusiasts have a slightly different approach. They are quiet happy to sit by a tree looking at a little brown job (LBJ) for twenty minutes or more. If it is a species that no one has seen before, that vehicle will not move for a long time. Pick your tour operator to suit your photography and take advice from others, there is plenty on offer for all levels and tastes. Recommended ReadingWildlife Pictures There are literally hundreds of books showing all aspects of wildlife. However, there are a few that I return to on a regular basis providing a constant source of inspiration:
Ready to GoWildlife Pictures After reading all the information you are now ready to embark on your safari. Before you go make sure you know your equipment. One of the best places to practice is in the wildlife parks, many of which are located throughout the world. You have all the time you need to pick your subject and select the appropriate camera and lens combination. Practice makes perfect, be patient and be there. Best of luck with your next safari.Wildlife Pictures
More of Michael's superb Wildlife Pictures can be seen in the Gallery of Better Photographs and in his gallery at www.michaelhuggan.com. Return from Wildlife Pictures to Photography Masterclass page. |
 |
| Image of the Month |
 |
| Click here to download it. |
| Find It |

Custom Search
|
| All of the advice, tutorials, masterclasses and ideas on this website are available to you at no charge. Even so, its upkeep does incur costs. |
|
| If you feel that the site has helped you then any contribution you make, however small, would go towards its ongoing maintenance and development. Thanks for your help. |
| Book of the Month |
 |
| Click here to read the review. |
