|
Sloping Horizon"Off the Straight and Level"Unless we are looking for a special effect, a sloping horizon just doesn't look right. When taking our eye off the horizon to pay attention to the subject in the foreground, it's very easy to tilt the camera without realizing it. Checking and re-checking the horizon can mean that we "miss the ideal moment" to press the shutter. SITUATION - A glorious sunset whilst enjoying cocktails on holiday. The sun, sky and colours across the beach make for an ideal photograph. We time the shot so that the pattern of the waves in the foreground is just right - and our attention to the horizon is distracted. Perhaps the last cocktail means that we are not quite as stable as usual?
If only we had been using a tripod or were a bit steadier on our feet. Steps taken using Photoshop Elements version 5 
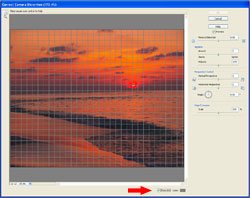
1 With the image to be corrected opened in an Edit window, select Filter then Correct Camera Distortion... 
2 A new window will open with tools which enable a number of corrections. Make sure that the Preview button is checked so that the effect of the changes can be seen as they occur. 
3 It's a good idea to check the Grid button as this makes it easier to see that the horizon is level when making adjustments. 
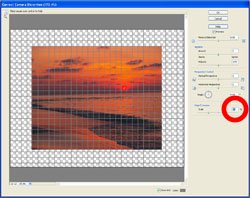
4 Type a number or use the slider to reduce the Edge Extension to about 75%. This leaves space around the image which will be needed later on. 
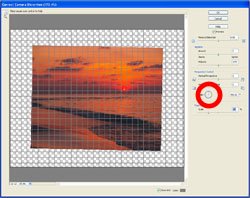
5 Click inside the circle labelled Angle, hold down the left button and move the mouse around until the horizon is level. When the desired adjustments are made, click OK to return to the Edit window. Tip - Keep the left button held down and move the mouse outside the circle for finer adjustments.
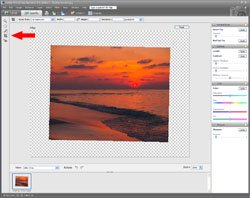
6 Levelling the sloping horizon has tilted the whole image. To correct this, select the Crop tool from the left hand side or from the Image menu. 
7 Position the mouse over the image, hold down the left mouse button and drag the crop tool across the image so as to leave the desired rectangle. The remainder of the image will be greyed out. Fine adjustments can be made by using the mouse to drag the sides and corners of the rectangle. 
8 Finished cropping? Press Enter, double click the mouse or click the green tick at the bottom right of the cropped area to reveal the completed image.
Remember to save the new image with a different name so as not to overwrite the original. Click here to add this page to your favorites in case you need to level a sloping horizon again.
This example is just one of the many ways in which Photoshop Elements or similar software can be used to help you make better photographs. Return from Sloping Horizon to the Photo Editing page. |
 |
| Image of the Month |
 |
| Click here to download it. |
| Find It |

Custom Search
|
| All of the advice, tutorials, masterclasses and ideas on this website are available to you at no charge. Even so, its upkeep does incur costs. |
|
| If you feel that the site has helped you then any contribution you make, however small, would go towards its ongoing maintenance and development. Thanks for your help. |
| Book of the Month |
 |
| Click here to read the review. |


