

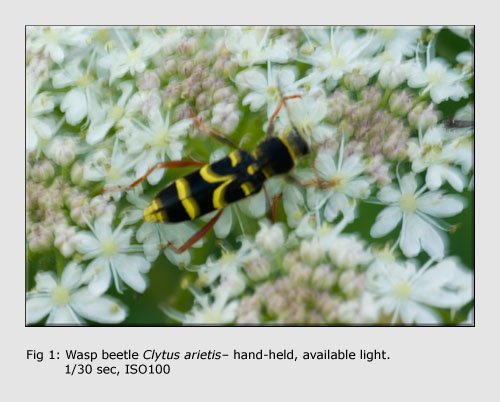
Close Up Photography“Sometimes Flash is the Only Option”Article and Images by John Bebbington FRPSWhy use flash in the first place? I personally prefer to use available light for close up photography with both film and digital cameras, especially for flower photography (it's only my opinion, but to me something of the subtle beauty of many flowers is lost when flash is used). Many invertebrates will, if approached carefully, allow the photographer to set up a tripod and long exposures are possible if there is no wind. I used Kodachrome 25 almost exclusively until its sad demise and often gave 2-3 minutes at f32. My longest successful available light exposure is 11Ω minutes, of a Mottled Beauty moth on a tree trunk, taken just before a violent thunderstorm. It is sharp and the colours are true! However when the subject is moving - whether it is a mobile insect or a flower blowing in the wind - and reasonable depth of field is required, available light may not be enough (figure 1).
Electronic flash is a convenient way of providing sufficient extra light to enable the use of smaller apertures and/or shorter exposure times. Flash can be used either as the only effective light source or balanced with available light. This can be done with the camera and flashguns set manually, or by using automatic (TTL or non-TTL) flash metering. For manual and non-TTL auto work, a basic knowledge of close-up flash technique is essential; for TTL flash this basic knowledge is still very useful. Understanding light output from flashguns A flashgun on manual setting will provide a short burst of light - usually of about 1/1000 second duration. A flashgun on auto setting - whether it is TTL or non-TTL - will vary light output by changing the duration of the flash, so very short effective exposures are possible. 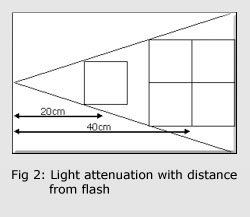
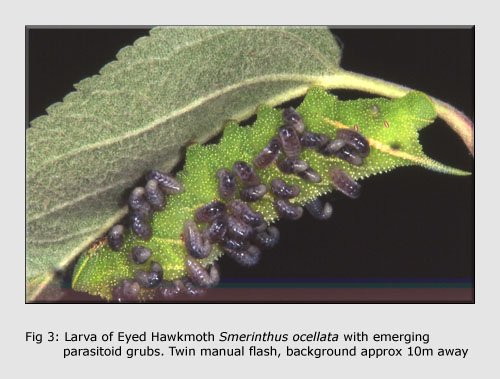
Whatever the power and duration of the flash, the light output attenuates with distance according to the inverse square law. For example, an object 20cm from the flashgun receives 1 unit of light; the same object 40cm from the flash only receives º the amount of light, as it has spread over an area 4x as large (figure 2); thus two stops more exposure is needed if flash is the only light source. The flash power for a gun on manual setting is normally expressed as a guide number (GN). This will be the maximum output for a totally automatic flash. GN = flash-to-subject distance (m) x f no. needed for a correct mid-tone exposure at ISO 100. Thus if f11 gives the correct exposure with the flashgun 2m from the subject, the GN will be (2 x 11) = 22. The guide number should be stated in the manufacturer's literature but on older models can be calculated from the dial or table on the flash by matching up distance and f number. Most flashguns are calibrated by the manufacturer in lab or studio conditions where there are white reflecting surfaces close by and these will contribute to the amount of light reaching the film or sensor - in field conditions the nearest white reflecting surfaces my be clouds at several thousand metres so they are no help! For manual flashguns a close-up guide number (CGN) should be calculated. This is usually about 2/3 the manufacturer's GN which means that 1 stop more exposure is needed. For the example above f8 rather than f11 would give the correct exposure at 2m so now the CGN is (2 x 8) = 16. With non-TTL auto flashguns the flashgun sensor reads reflected light and controls flash duration. With TTL auto flashguns the camera itself meters exposure and controls flash duration. Using lenses of different focal lengths Longer focal length lenses have the disadvantage of weight but are especially useful for insect photography because they allow a greater working distance, with less chance of disturbing the subject. Where flash is the sole light source, there is often a problem with dark or black backgrounds. The shorter the focal length of the lens used, the greater the problem is likely to be. For example, let's suppose we are photographing an insect at half life-size with a background 10cm behind it. Using first my 90mm then my 180mm macro lenses I made the measurements below: With a 90 mm lens, flash-to-subject distance = 0.15m and flash-to-background distance = 0.25m. The background is about 1.67x as far away as the subject and is about 1Ω stops underexposed. With a 180 mm lens, flash-to-subject distance = 0.5m and flash-to-background distance = 0.6m. The background is about 1.2x as far away as the subject and is only about Ω stop underexposed. In any case, if the background is too far away, it will be black and this will probably look unnatural, as in this image of a parasitized Eyed hawkmoth larva, taken deliberately against a distant background to show the effect.
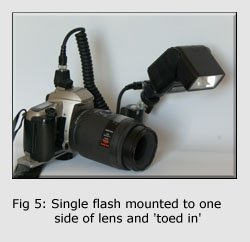
Understanding the effect of macro lenses, extension tubes or bellows and teleconverters on the amount of light reaching the film or digital sensor. The lens iris diaphragm is effectively the light source for the film or digital sensor. If this light source is moved further from the film/sensor plane so the light intensity decreases according to the inverse square law and either the aperture has to be widened or the exposure time increased to give enough light. With all the different macro lenses which I have tried, 2 stops more exposure is needed when the lens is focused at life-size (1:1) than at infinity. Extension tubes or bellows increase the distance between the lens and the film/sensor plane and so reduce the amount of light reaching it. Teleconverters reduce the amount of light reaching the film/sensor plane by 1 stop (x1.4 converter) or 2 stops (x2 converter) When setting up manual or non-TTL auto outfits it is necessary to take these effects into account; with TTL metering the camera will compensate but the flashgun(s) may not have enough power to allow the use of small apertures. Using manually controlled flashguns Single flash Positioning and mounting the flashgun 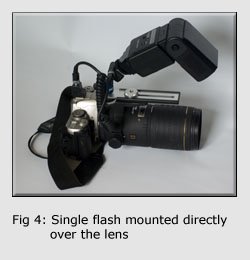 Ideally the flashgun should be mounted on a
bracket with a tilt-and-swivel head, which means that it can be set at
the appropriate angle for the lens and magnification ratio being used. Calculations With the flashgun bracket-mounted as above the simplest calculation is to work out the appropriate aperture (f no.). Set up the kit on a table top and preset the magnification at 1:2 (half life-size). Look through the lens and move a suitable object (say a film box or similar) into focus. Measure the distance (d) (in metres) from the flash tube to the object. Work out the relative extension (RE):RE = 1+ magnification ratio, or 1+ (length of extension tube or bellows/focal length of lens) The correct aperture (f) for a mid-tone subject can now be calculated: aperture = close-up guide no/(flash-to-subject distance x relative extension) or f = CGN/(d x RE). Repeat the exercise with the magnification preset at 1:1. The two calculated f numbers are starting points and it is now necessary to calibrate the setup. Calibration For film this should be done outdoors with slide film because, when negative film is printed, the processing lab will try to produce a decent print whatever the exposure. Take careful measurements and notes and be logical and methodical - then you will be able to repeat successful results! Select a mid-tone subject and photograph it firstly at 1:2 and then 1:1, starting with the aperture 2 stops wider open than the calculated value: for example, if f16 was the calculated value, start at f8. Stop down half a stop at a time until the aperture is 2 stops smaller than the calculated value (here f32). Remember to allow the flashgun to recharge fully between exposures and include a label with the f number in the frame! Repeat the process with a white textured subject and a black textured subject . The processed slides should be compared side-by-side on a light table and the 'best' results projected for final choice. If the flash is not powerful enough, then it can be moved closer; or if it is too powerful a diffuser can be fitted to it. Two flashguns Positioning and mounting the flashguns 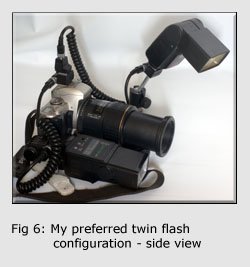 Again the flashguns should be mounted on
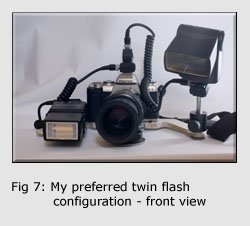
brackets with tilt-and-swivel heads. My preferred configuration is
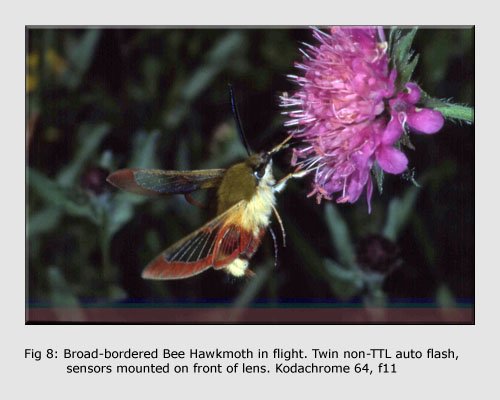
shown in figures 6 & 7. Calculations These are slightly more complex than for single flash work. It is best to mount the flashguns more or less as in figures 8 & 9 and then choose the aperture (say f22) in order to calculate flash-to-subject distances. The main flash should give about twice as much light as the subsidiary flash. This the subsidiary flash should be less powerful - or, if the same model, a diffuser is needed. For the main flash, flash-to-subject distance dmain is calculated by dmain = CGN/((f + Ω stop) x RE)Here f + Ω stop = f19. For the subsidiary flash, flash-to-subject distance dsubsid is calculated by dsubsid = CGN/((f + 1Ω stops) x RE) Here f + 1Ω stops = f13. The end result is that the main flash is 1 stop more powerful than the subsidiary flash, giving a 2:1 balance which is an ideal starting point, giving soft shadows behind the subject. Calibration Follow the same procedure as for a single flash, keeping careful notes. For manual flash, stop down about 1 stop for white or very bright subjects and open up about 1 stop for black or very dark subjects. Using non-TTL auto flash with film SLRs Single or twin flash Positioning of flashgun(s) can be as for manual flash. If the flashgun has a detachable sensor and sensor lead, this is best mounted on the end of the lens; if not, make sure that the sensor is not obscured and can read light reflected from the subject. According to instruction books, most non-TTL auto flashguns will not work closer than 1m - this is because the flash duration will not be short enough at closer range and overexposure will result. My first non-TTL auto flashgun was a National PE-3057 and for a distance of 1m, f11 was given as the aperture. I checked it out and all was OK. However I needed to work at 0.5m; so I stopped down to f22 (remember the inverse square law - twice as close, 4x as much light - stop down 2 stops). It worked well and flash duration was short enough to enable me to capture a wild specimen of Broad-bordered Bee Hawk in flight (figure 8).
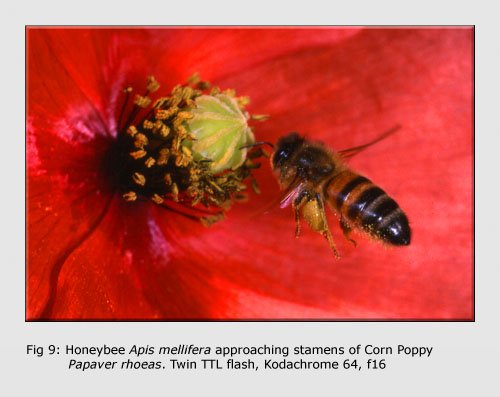
Calibration is necessary to be sure that the sensor can work adequately. For non-TTL auto flash, open up about 1 stop for white or very bright subjects and stop down about 1 stop for black or very dark subjects. Using TTL flash with film SLRs As the sole light source With my film SLRs I use twin TTL flash, configured as in figures 5 & 6. Flash synchronisation speed is 1/125 second. When using ISO 100, the flash duration is short enough (probably about 1/10,000 second) to enable me to photograph insects such as Honeybees in flight at f22 (figure 9). The exposure is effectively 1/125 sec at f22, which is so far below available light exposure as to render ambient light irrelevant. There may be problems with black backgrounds if they are too far away.
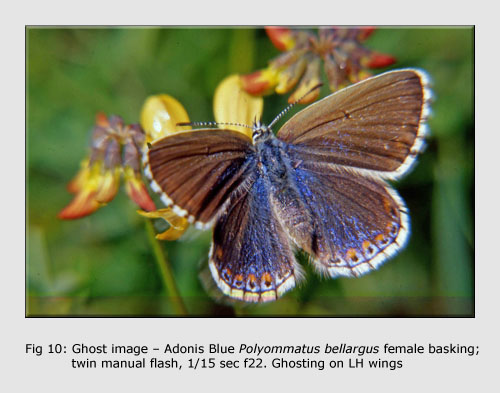
Balanced with available light If a much slower shutter speed (say 1/15 sec) is used then ambient light will affect the exposure and there will be less problems with dark backgrounds. However unless the camera is tripod mounted there may be ghost images resulting from camera movement during exposure, as in figure 10.
Using old manual flashguns with digital SLRs 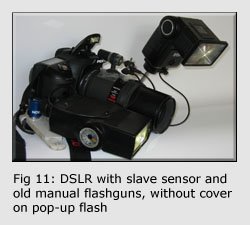 Most older manual flashguns have a very high
discharge voltage which will damage the electronics of a DSLR if they
are connected! However it is possible to use them on a DSLR without
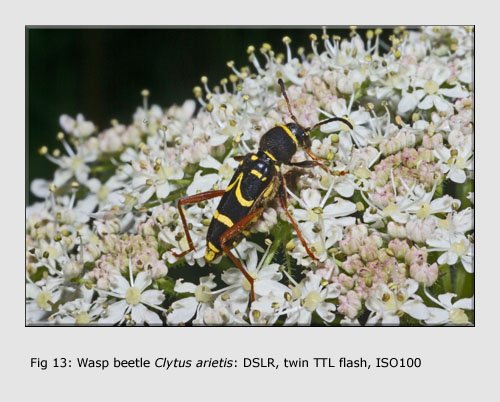
direct connection. The same calibrations as for film SLRs are used, with the advantage that results are instantaneous. Shoot in JPEG format for calibration, as most software will 'correct' exposure when RAW files are opened. Using TTL flash with digital SLRs As the sole light source Follow the same procedure as for film SLRs above. Figure 13 shows a typical result with dark background.
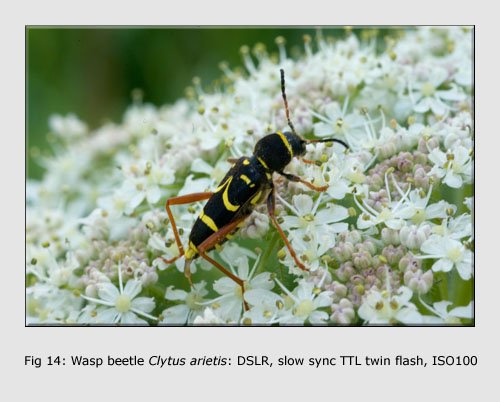
Balanced with available light Slow sync The same remarks apply as for film SLRs. Figure 14 shows a typical result with available light giving background detail.
Trailing curtain slow sync Sometimes the flash during a longish (e.g. 1/15 sec) exposure may disturb the subject and it will move before the shutter closes. When using trailing curtain (aka second curtain) slow sync the flashgun does not fire until the end of the exposure and subject movement becomes irrelevant. And finally - a checklist!
Recommended
Reading
Return from Close Up Photography to Photography Masterclass page. |

 |
![]()
| Image of the Month |
 |
| Click here to download it. |
| Find It |

Custom Search
|
| All of the advice, tutorials, masterclasses and ideas on this website are available to you at no charge. Even so, its upkeep does incur costs. |
|
| If you feel that
the site has helped you then any contribution you make, however small,
would go towards its ongoing maintenance and development. Thanks for your help. |
| Book of the Month |
 |
| Click here to read the review. |
|
|