
[?] Subscribe To This Site


Video Editing
|

| The Clip Trimmer allows you to trim a clip, and choose which part is selected in a more precise way. It also reveals the non-destructive nature of the timeline - you will see the selected section which appears on your timeline, and also the unused section, which is still there. | 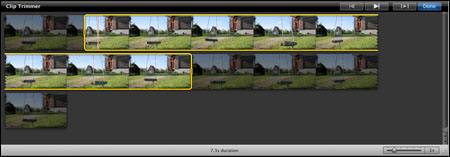 |
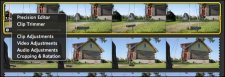 |
The Precision Editor allows you to accurately edit the point at which a cut or transition is made between two clips on your timeline. Dragging the blue dot moves the position at which the edit occurs. |
| Using just these few editing tools, you should now be able to put together a refined edit of your shot sequence. | 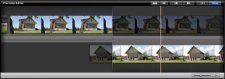 |
TRANSITIONS video editing
iMovie contains a library of basic transitions - effects that join two clips together.
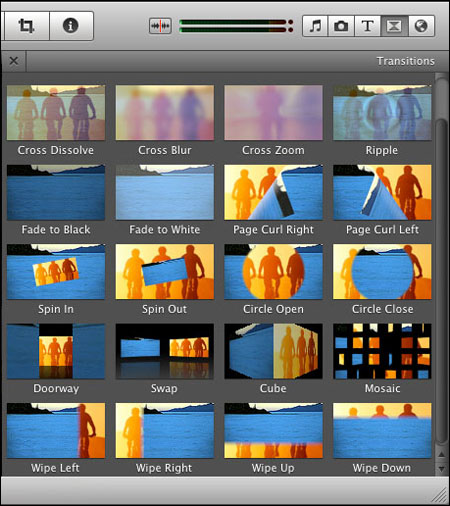
You can go crazy with Star Wars style Wipes, Ripples and Spins, but most movies and TV shows get by using just Fades, Cross Dissolves and straight cuts, so I'd suggest leaving that Mosaic transition in its box. To apply a transition, drag it from the Transition window to the timeline between two clips (or to the beginning or end of your film for fade in/fade out).
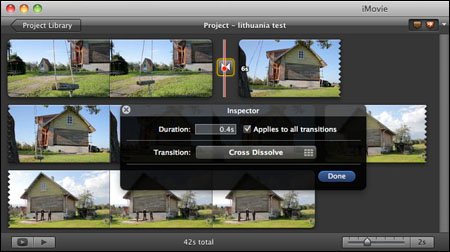
| You can then edit the length of the transition, and change the style by double clicking on its icon in the timeline, which brings up an Inspector window. You can choose to have the same length of transition applied each time, or change it according to your needs. | 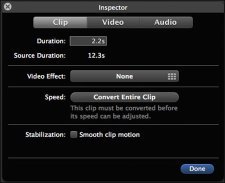 |
EFFECTS AND GRADING video editing
You should now have a basic edit, with trimmed shots and a few selected transitions. Now it is time to refine the look of the footage, making sure all the shots are balanced, and adding any effects that might be needed.
Select a representative clip and click the Cog dropdown (or just double click the clip) to open the Clip Inspector.
On the Clip tab, you can add an effect to your clip if required, change its speed and add stabilisation. Effects should be used sparingly - they are not adjustable, simply on or off, and are best avoided if possible.
| The Audio tab allows you to change the volume of the clip's audio, how long it takes to fade in or out, as well as Ducking any other audio - for instance if you have a soundtrack playing throughout the film that needs to get quieter in order to hear the dialogue on a clip. | 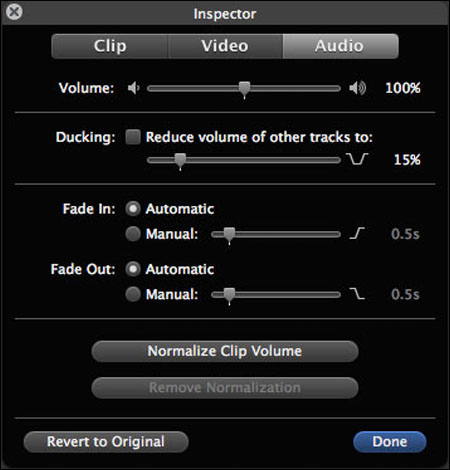 |
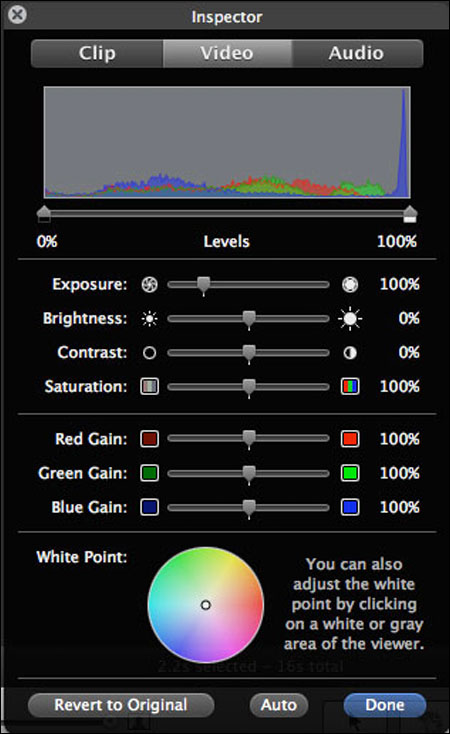 |
The Video tab has extremely powerful grading tools, offered up in an albeit non-precise way - sliders only. iMovie allows the levels of a clip to be altered, as well as offering separate controls over exposure, brightness, contrast, saturation, individual RGB sliders and an overall white point selector. |
Play around with these controls subtly, and you should be able to achieve anything from contrasty black and white through a yellowing Super 8 film stock, to a desaturated art cinema look - the possibilities are huge. You can always revert to the original footage at any time, so you may as well give it a go.
COPYING EFFECTS, AUDIO SETTINGS AND GRADING video editing
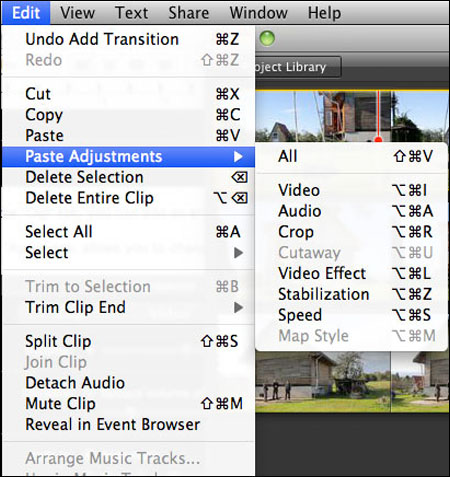
What if you have 40 clips that all want the same basic treatment? To avoid the time consuming tedium of having to adjust every similar clip, you can copy and paste styles and effects. Simply select the graded clip and copy it. Select the clip you want to alter in the same way and choose EDIT > PASTE ADJUSTMENTS. You can choose to paste all of the settings or just one aspect. After you have completed one clip to your liking, basic grading on the whole project takes just minutes. Minor adjustments can then be made to individual clips as required.
Audio video editing
| iMovie 11, which is being released at time of writing, will introduce enhanced audio controls, which should allow for noise reduction and better general volume controls, but even in the current version you can add multiple layers of audio simply by dragging them from the Music and Sound Effects window, as well as controlling the volume of individual clips. Balance your audio, before adding music and sound effects. | 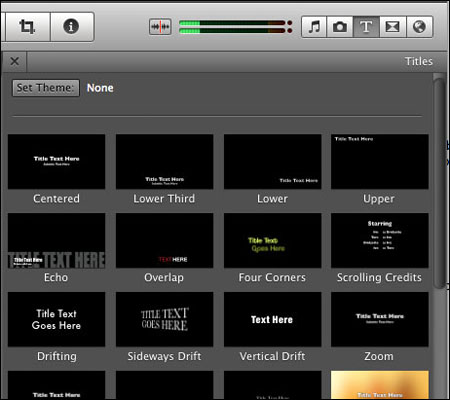 |
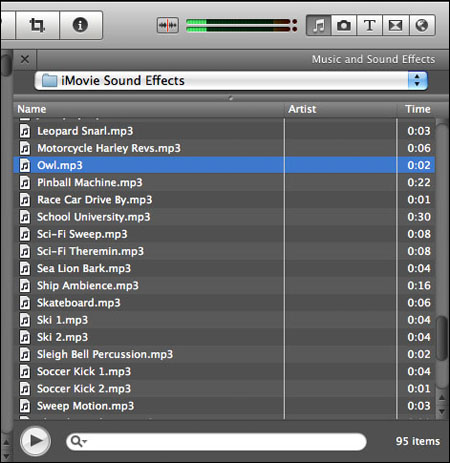 |
iMovie contains some basic soundtracks and effects, and it's not too hard to find royalty free audio on the web. If all you can hear is wind from the built in microphone - all is not lost. Just mute the audio and add a musical score - it can sometimes transform what you have shot into something surprising. If you intend to do a film with a musical soundtrack, you may want to add the audio track early on, so you can edit to the music. |
Stills video editing
You can add stills from your iPhoto library by dragging them from the dedicated tab. The Ken Burns Effect, which animates stills by having a start and end point, is added automatically by default, but you can edit the settings by selecting the clip and clicking the Crop icon, or turn it off completely by selecting Fit.
Titles video editing
When you have your final edit, you can add some credits or titles using the very simple tools built in to iMovie. Again, err on the side of subtlety to add professionalism to your film - avoid My Great Day Out at Camber Sands written in Chalkboard.
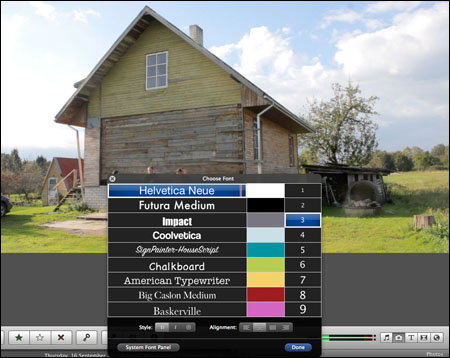
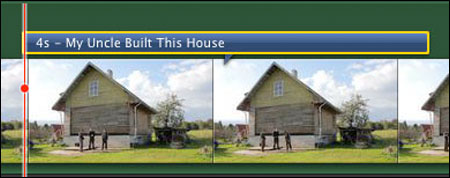
You can choose the font, size, colour, style and duration, as well as the basic look - just drag your choice from the Titles window, and click the text in the Edit window to edit it. Move your text around on the timeline by dragging it, and change the length of time it appears and time it takes to fade by double clicking it on the timeline to open an Inspector window.
EXPORTING video editing
Finally, you have completed your first film - it looks like a Hollywood blockbuster, and you've given yourself credit for being writer, director, editor, soundman and best boy - time to share your talents with the world!
iMovie is a powerful application for exporting high quality video. Under the Share menu, you will be given basic presets which work brilliantly for the given environments - YouTube, iPhone, HD, etc - and you may never require more, so simply choose how big you want it or where you want to show it and click go!
But what if your little blockbuster gets chosen to be shown at a festival that requires a ProRes file? No need to panic. If you export Using Quicktime, you will find dozens of professional industry standard codecs, and myriad options for exporting your project in broadcast quality and above at almost any size.
CONCLUSION video editing
With the rapidly expanding market of affordable DSLRs capable of capturing high definition video, it's a good idea to be able to turn that footage into something watchable that you can share with a wider audience. Applications such as iMovie and Windows Movie Maker allow you the opportunity to produce professional results, with minimum outlay and a very shallow learning curve. Try making a three minute movie and practice your editing skills. You maybe be surprised with the results that are possible using free software and a little patience.
WORKFLOW IN BRIEF
|
Here's the
finished video,
all done in iMovie -
"Article
first published in the RPS
Journal December 2010/January 2011 - No reproduction
without permission."
Will
Hutchinson has had an enduring interest in Photography since working in
the industry in the early 1990s. He has recently established his
own design and film production company - Hutch FilmsTake a look at Will's other articles on DSLR Video.
How to shoot great movies with your DSLR Video Camera.
Ensure your Movie has the best possible Sound Track.

 |
![]()
| Image of the Month |
 |
| Click here to download it. |
| Find It |

Custom Search
|
| All of the advice, tutorials, masterclasses and ideas on this website are available to you at no charge. Even so, its upkeep does incur costs. |
|
| If you feel that
the site has helped you then any contribution you make, however small,
would go towards its ongoing maintenance and development. Thanks for your help. |
| Book of the Month |
 |
| Click here to read the review. |
|
|
New! Comments
Have your say about what you just read! Leave me a comment in the box below.