The Colour Wheel
"An Indispensable Therapy
for Better Photographs"Original Article by Helen Harris
"Article first featured in Olympus User Magazine"
COLOUR FILM AND processing really caught on in the 70s, but an understanding of the colour wheel has always been fundamental to photography. It's not surprising; if photography is about recording and celebrating the world around us, colour is a crucial part of that world.
Colour also has a fundamental psychological effect on us. Imagine how depressing it would to live in a world drained of colour. Colour inspires and motivates, and even helps us make sense of the world (red for stop, green for go, yellow and black for danger). As photographers, we need to be sensitive to colour, and understand how we can use it - and sometimes manipulate it - to make great images. There's a whole science of colour, but a lot of it comes down to instinct and experience. Time spent thinking about colour and how best to use it in photography will really pay dividends.
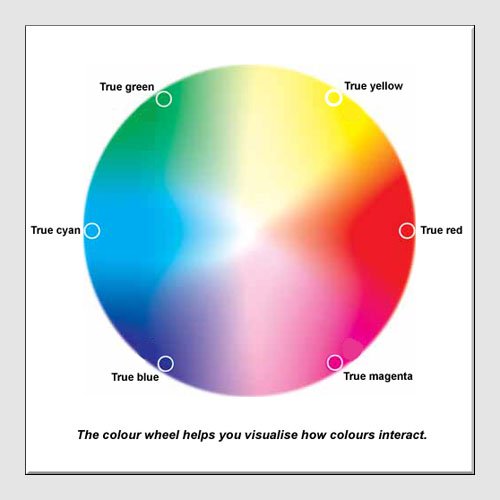
Life in colour Colour Wheel
Let’s not worry too much about the technicalities of hues and spectrums at this stage. Colours are simply made up of light at different wavelengths and frequencies. While there is a huge range of colours in the colour spectrum, the receptors in the human eye can only detect red, green and blue, and variations of the three. Colour photography reflects this. Modern cameras are obviously very good at capturing colours accurately, but great colour photography is about more than this. It’s about using colour as a fundamental compositional tool, so the final image communicates with the viewer and elicits a certain emotional response. Take an image with lots of strong reds, for instance. Red instantly draws attention to itself, and has a range of associations – anger, danger, vitality, glamour. Increasing the saturation so the colours are as bright as possible will elicit one response, muting them to create a paler contrast will elicit another. Or, you can deliberately give an image a colour cast, (dominant colour) to affect mood – a subtle blue cast will make a landscape or cityscape look quite melancholy, for instance.
The colour wheel is a good way to visualise how colours work with and against each other. If you combine colours and hues that are separated from each other on the colour wheel, you get strong colour contrast – green and orange, for instance. Keeping the colour wheel in mind will also help when you are editing colours in photo editing software, but more on this later.
Understanding colour temperature Colour Wheel
While modern cameras usually get the colours in a scene spot on, they are always at the mercy of the light source in a scene. Different light sources will have different ‘colour temperatures’. Understanding this will enable you to select the right light source for a particular scene, ensuring your shots don’t have an inappropriate ‘colour cast’ – a cold blue sheen on a holiday shot, for instance.
The white balance settings on your camera will tell it what the light source is, e.g. a sunny day or a fluorescent lamp indoors. Most of the time, you can rely on the Auto White Balance to get this right, but it’s useful to know how to manually select the particular light source for the conditions in which you are shooting. Press the WB button on the E-3 SLR, for instance, and then use the wheel under the top screen to scroll through the white balance options (you can also change the white balance of a shot in Olympus Master if you shoot in RAW). As well as removing unwanted colour casts, white balance can be used in a creative way. You can cool down a sunset, for instance, by changing from Auto to tungsten light mode.

Odd as it sounds, selecting an ‘artificial light’ source in White Balance can often help sunrises and sunsets look more dramatic.
Working with colour Colour Wheel
Enough theory, let’s look at some practical examples of how to use colour as a compositional device.
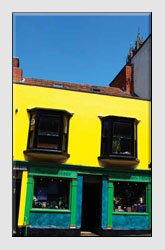
1Don’t get carried away
Combining strongly contrasting colours and shapes can be really striking, as shown here. But this image works because of its relative simplicity – if there were too many strongly coloured elements in the shot all working against each other, the composition would be less successful.

2Be muted
Be sensitive to the context of your shot, and don’t be afraid of muted colours if they add to the atmosphere and capture the time of day. The subdued tones in our morning shot of Prague, for instance, are much more evocative than the garish, artificially saturated hues you see in cheap postcards.
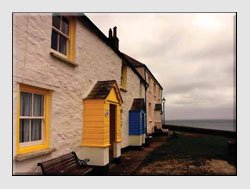
3Look for patterns and contrast
Bright colours also work best in photography when they are arranged in a pattern or sequence, or are used sparingly, so they contrast with a prevailing pale background – see how the yellow and blue stands out in our Cornish cottages.

4Work with a simple colour scheme
Related to the first point, using a specific colour as part of a clear compositional structure can pay dividends. It also enables you to exploit the particular emotional associations of a colour – cool summery green in the shot of this frog, for instance.
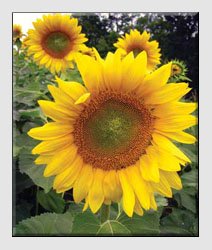
5Be sophisticated with saturation
In this sunflower shot, we kicked up the saturation of the yellow to make the flowers really stand out and evoke summer. But if we’d wanted a more serene effect, we could have shot the whole sunflower field in the much softer yellowy light of evening. As we’ll see, adjusting colour saturation is very easy with photo editing software.
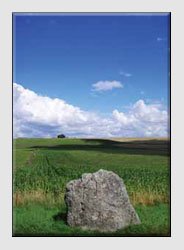
6Use other colours as support
A good tip when shooting landscapes is to aim to capture one main subject and colour, and use extra colours in a supporting role. Again, it’s about ensuring colours work with each other, not against. Primary colours (blue, red, or yellow) will complement secondary colours, such as green, purple and orange.
Get consistently great colours Colour Wheel
Having explored some of the creative ways you can use colour, how do you ensure the colours look as good as possible in your shots? Olympus users have several options. Depending on your camera, you can specify that certain colours are made brighter to suit the scene. Olympus SLRs, for instance, enable you to choose ‘Vivid’ Picture Mode (just press Menu/Picture Mode). Then you can adjust contrast, sharpness and saturation. Alternatively, you can choose Natural or Muted Picture Mode for a more restrained image, or lose the colour altogether by selecting Monochrome.
Don’t worry if you don’t have an SLR, because compact camera owners also control colour via the camera’s scene modes – Sunset, for example, will boost the rich oranges of this special time of day. If you’d rather just get out there and take shots, it’s also very easy to tweak colours on the computer, using your free Olympus Master software. As explained on page 36, the Hue/Saturation tool on the Edit menu is great for boosting colours. If you shoot in RAW, you can replicate all the SLR Picture Modes described above via the RAW Basic2 tab.

Select Vivid mode on your Olympus SLR for vibrant colours.
Software colour tips Colour Wheel
As mentioned, colours are very easy to enhance on the computer. With free or cheap photo-editing software you can boost colours, and edit specific ones, for great creative results.
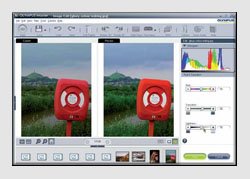
1Olympus Master tweaks
Olympus Master enables you to boost hue and saturation for deeper colours – use the sliders sparingly though to avoid that cheap postcard look.
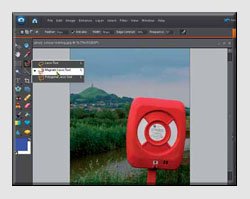
2Change specific colours
For fine colour control, Photoshop Elements is a great value tool (get a free trial from www.adobe.com). Let’s begin by selecting the Magnetic Lasso tool from the left-hand toolbar.
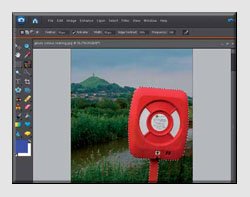
3Select an object
On the top toolbar, set Feather, Width and Contrast to 10 pixels and Frequency to 100. Now, carefully click around the object to work on. Double click to end the selection.
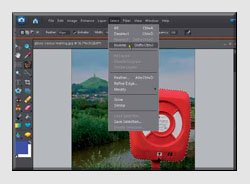
4Invert the selection
With the colour object separated off from the rest of the image, go to the Select menu and select Inverse (to reverse the selection).
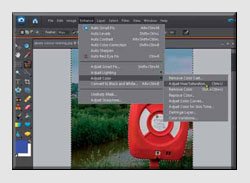
5Drop the saturation
Now go to Enhance/Adjust Colour/Adjust Hue and Saturation and take the saturation down to around -80. This will turn the background black and white.
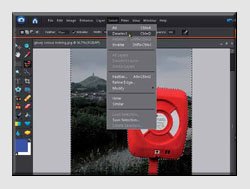
6Time to deselect
As you can see it’s a striking look. Almost there – simply go to the Select menu and pick Deselect to cement the changes.
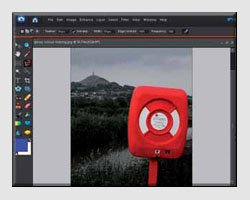
7Perfect the image
You can then fine-tune the tone and saturation in the final image, sharpen the edges and so on. Not bad for five minutes work!
Colour Wheel
© Olympus UK
Click here for more Tutorial Articles by OM Systems
(formerly Olympus Cameras).
Don't miss our Top Tip on how to improve the accuracy of your colour printing.
Return from The Colour Wheel to the Photography Tutor page.




New! Comments
Have your say about what you just read! Leave me a comment in the box below.