Introduction
It has always been possible to combine photographic images but the
advent of digital imaging has made the process far easier, although it
has also created pitfalls.
My particular interest in image stacking comes from the desire to
produce photomicrographs of butterfly and moth scales, pollen grains
and other minute plant structures with far more depth of field than I
could obtain with film. When I used to show Kodachrome 25
transparencies of butterfly or moth wing scales photographed at x100
through the microscope, audiences were usually wowed, but because the
wings themselves are not flat, depth of field was limited. The impact
is far greater when the image is sharp overall.
As stated above, butterfly and moth wings are not flat and there can be
millimetres of difference between the highest and lowest areas of a
wing under the microscope. This is far too much for edge-to-edge
sharpness at x100. Using a cover slip to flatten the wing is useful for
transmitted light images, but isn’t really an option when photographing
by reflected light.
I have never had access to electron microscopy or had the technique,
time and patience which some darkroom workers have used to produce
multiple image film photomicrographs; so when I heard that software
could be used to combine digital images it seemed to be worth
investigating.
As I’m primarily a Mac user I began by downloading a free trial version
of the only reasonably-priced compatible software I could find –
Helicon Focus – which seemed simple and straightforward. I began by
scanning some old film photomicrographs and tried to combine them, but
this failed because they didn’t register properly.
I then tried using our Canon digital Ixus 500 compact, held over the
microscope eyepiece (we didn’t have a microscope adaptor for this
camera at the time) but although the individual images were very good
indeed, registration was once again a problem.
At about this time Pentax brought out the K10D which is compatible with
all my old Pentax film gear including the microscope adaptor. At last
it was possible to take images which were accurately registered and
suitable for blending with Helicon Focus. An added bonus was the gift
of an old Nikon photographic microscope which was ‘broken’ – it
actually needed nothing more than a new mains plug! Obviously this has
superb optics. It also has a numbered scale on the fine focus knob and
a fixed mark on the coarse focus, which makes selection of the
necessary focus range, and of the vertical interval between images,
very straightforward.
Reflected light images
I obtain my butterfly and moth wings from road casualties, spiders’
webs and by scrounging from butterfly houses, so no live creatures are
harmed in the process!
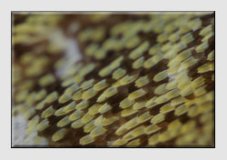

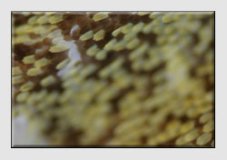

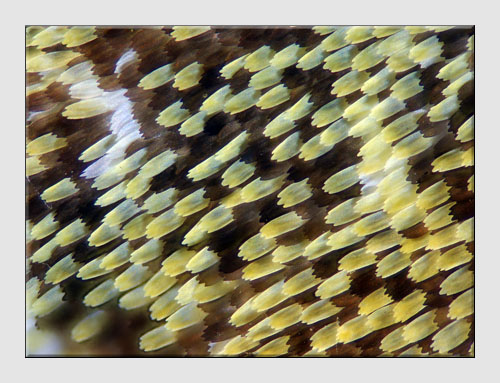
Illustration 1: Fifteen Images
of Orange-tip 'green' scales (Images 1 and 15 at top) are combined
using
Helicon Focus to produce the Final Image.
For
this example I chose the underside of the hind wing of an Orange-tip
butterfly. It has what appear to be green patches, but these in fact
are made up of a mixture of yellow and black scales.
Firstly I cut out a piece of the wing and attached it as flat as I
could to a microscope using Scotch Magic tape. This was then placed on
the microscope stage and a suitable area selected by looking through
the microscope. The camera was then mounted and the lighting set up;
this was a cold swan-neck (optic fibre) lamp, with a silver foil
reflector placed so as to reduce hard shadows. The lamp was turned to
full power for initial focusing purposes – a live view facility would
have made this far easier, but the K10D doesn’t have this!
I found the highest focus point of the image and noted the reading on
the scale (20), then the lowest focus point (35). A series of 15 images
were then taken, using the same manual exposure (varying the exposure
can confuse the software) and ensuring precise registration, focusing
down one scale mark at a time. I quickly found that it was important to
stand absolutely still during each exposure.
It would have been easiest to take JPEG images as this shortens
processing times; but I used RAW as I may one day wish to produce
prints rather than files for projection. Processing for blending and
eventual projection involved opening the RAW file and making any
necessary adjustments – these must be identical for each file. Each
file was then saved as an uncompressed TIFF.
The files for blending were then selected from within the Helicon Focus
programme, using default settings (I still haven’t explored the
programme properly) and I hit the ‘run’ button. Eventually the software
produced a blended file, which was saved as a TIFF, then resized for
projection and sharpened appropriately.
Transmitted light
Transmitted light images are produced using the built-in microscope
lamp with the camera white balance set to tungsten – no more need for
all those blue filters which I had accumulated. The same procedure as
for a reflected light image is followed, finding the highest and lowest
focus points and taking a series of images.
The biggest problem I found was in getting absolute cleanliness of
optics and microscope slides – a disadvantage of living in a dusty old
house! However, Photoshop was used to ‘spot out’ the final image.
I particularly wanted, for a talk on ‘Fruits and Seed Dispersal’, to
produce an image of the barbs which are found in Burdock seed heads –
the ‘itching powder’ which makes dogs scratch when they get burdock
heads in their fur. Interestingly it takes a day or two for the barbs
to reach the skin, so the dog will probably be some distance from the
plant when it scratches, so aiding seed dispersal.
These barbs – at the most 5mm long in real life – are beautifully sculptured, as can be seen from the blended image.
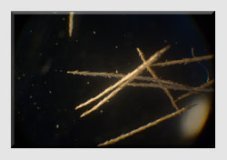
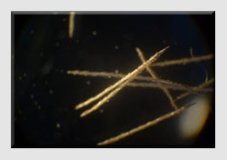
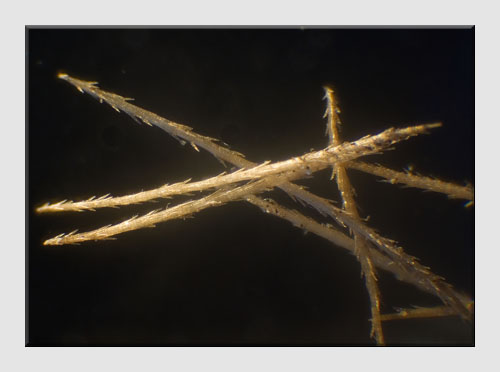
Illustration 2: Six Images
of Burdock barbs (Shots 1 and 6 at top) are combined using
Helicon Focus to produce the Final Image.
Conclusions
about Helicon Focus
Although I can’t make comparisons, it’s a
reasonably cheap bit of software which works well for me. I have tried
the sort of thing which John McCormack describes in his masterclass, both with flowers and
with
moths (the best moth image has 4.5cm depth of field with 40 images
taken at f5.6 combined), but I mainly use it for photomicrography. I
would say that it is user-friendly and effective.


New! Comments
Have your say about what you just read! Leave me a comment in the box below.